Rotator Cuff Injury Test: How to Check Yourself
Shoulder pain when reaching overhead or lifting that grocery bag isn’t something you have to just accept. A set of clinician-approved movements—originally designed for professional exams—can help you get a clearer picture of what might be going on with your rotator cuff.
Primary test for supraspinatus: Drop Arm Test · At-home tests listed: Empty Can, Drop Arm, Lift-Off · First diagnostic step: Physical exam · Imaging options: X-ray, ultrasound, MRI
Quick snapshot
- Empty Can Test targets supraspinatus muscle and tendon (Physio-pedia)
- Drop Arm Test detects full-thickness tears (Physio-pedia)
- Both tests use 90-degree arm abduction (Medbridge)
- Accuracy of self-tests versus professional diagnosis
- Whether smaller rotator cuff tears consistently show positive results
- Reliability of home adaptations without a partner’s assistance
- Drop Arm Test sensitivity reportedly 73% per Miller et al. 2008 (YouTube – Rotator Cuff Tests)
- Full Can Test metrics published by Jen et al. in 2017 (YouTube – Rotator Cuff Tests)
- Empty Can Test originally described by Jobe for supraspinatus strength (YouTube – Rotator Cuff Tests)
- Positive self-test results warrant professional evaluation
- MRI or ultrasound can confirm suspected full-thickness tears
- Non-surgical options including rest, physical therapy, and targeted exercises
The table below summarizes the key technical specifications for the primary rotator cuff assessment tests.
| Label | Value |
|---|---|
| Gold standard test | Drop Arm Test |
| Targets supraspinatus | Abduction to 90° |
| Professional first step | Physical exam |
| At-home alternatives | 3 self-tests |
How do I check myself for rotator cuff injury?
Before attempting any at-home assessment, start with a physical exam as your first diagnostic step. Gently move your arm through its full range of motion, noting any pain arcs or positions that trigger discomfort. According to Medbridge’s clinical guidance, observing where pain occurs and whether weakness accompanies specific movements gives you baseline information to share with a clinician.
Empty Can Test
Stand with your arm at your side, then raise it out to the side until it reaches shoulder height. Turn your palm toward the floor (thumb pointing down), and slowly lift the arm forward and up to about shoulder level—imagine pouring out an empty can. Hold the position briefly, then lower slowly. A positive result is marked by pain or pronounced weakness when resisting downward pressure. To confirm a supraspinatus involvement, repeat the movement with your thumb pointing up; if pain decreases noticeably, the supraspinatus is likely the source, per Centeno-Schultz Clinic guidance.
Drop Arm Test
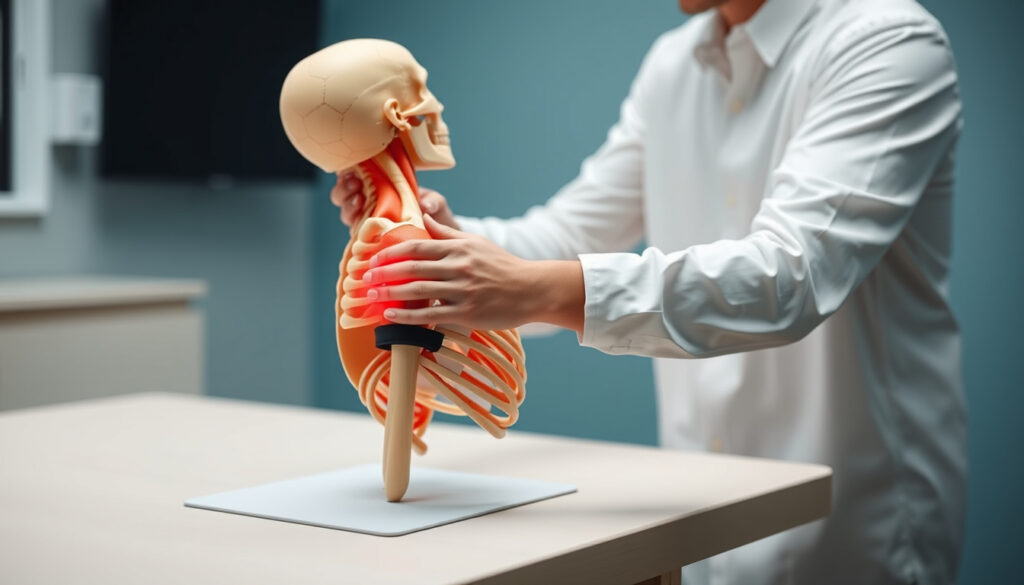
The Drop Arm Test is widely regarded as the primary assessment for detecting full-thickness supraspinatus tears. Raise your arm out to the side and overhead until it reaches 90 degrees of abduction—you can use your other arm or a wall for support. Have a partner gently release your arm, or carefully let go yourself if alone. Lower the arm slowly and controlled; if it drops uncontrollably or you feel sharp pain, that’s a positive result indicating a serious injury requiring immediate professional attention, according to Cawley Physical Therapy. Smaller injuries may not trigger a positive Drop Arm, so combine it with the Empty Can for better detection accuracy, as recommended by the Bangalore Shoulder Institute.
Combining the Drop Arm with the Empty Can improves your odds of catching what one test alone might miss. The Drop Arm flags large, full-thickness tears; the Empty Can picks up smaller supraspinatus irritations. Using both gives you a more complete picture before you walk into a clinician’s office.
Lift-Off Test
For this test, reach your affected arm behind your back with the palm facing outward. Try to lift the hand away from your lower back against mild resistance. Difficulty or pain performing this movement may indicate subscapularis involvement, a deeper rotator cuff muscle. While the Lift-Off specifically targets internal rotation strength, it complements the supraspinatus-focused tests above for a more thorough shoulder screen.
A positive test at home is a signal, not a verdict. It tells you something worth discussing with a professional—not a diagnosis. The clinical examination and any imaging your doctor orders will fill in the gaps these self-checks cannot cover.
How to tell if a rotator cuff is torn or just strained?
Strains and tears exist on a spectrum of severity, and the distinction matters for treatment planning. A strain involves muscle or tendon damage without a complete discontinuity, typically causing pain and temporary weakness that often improves with rest. A tear—whether partial or full-thickness—involves an actual rupture in the tendon tissue. The key differentiator is functional loss: a strained rotator cuff usually permits some controlled movement despite discomfort, while a torn rotator cuff often produces sudden weakness and may prevent you from lifting your arm without assistance.
Pain and weakness differences
Pay attention to the nature of your symptoms. With a strain, pain is typically localized to the front of the shoulder and may ache persistently. Weakness, if present, tends to emerge gradually and worsens with repetitive use. A tear more often produces sharper pain that radiates to the lateral deltoid, and weakness appears suddenly—particularly when lifting or holding the arm overhead. Physio-pedia notes that the Drop Arm Test’s ability to detect full-thickness tears specifically helps separate these two presentations.
Test results interpretation
Interpreting your self-test results requires context about what each finding suggests. Pain during the Empty Can without dramatic dropping may indicate impingement or a partial tear. An inability to hold your arm at 90 degrees after release points more strongly toward a full-thickness tear. No symptoms across any test suggests the pain source may lie elsewhere—possibly referred from the neck or due to bursitis rather than rotator cuff pathology.
How do you know if you have a torn rotator cuff?
Beyond specific tests, certain warning signs cluster around rotator cuff injuries. Two red flags clinicians watch for are weakness in overhead activities and pain that disrupts sleep, particularly when lying on the affected side. These signals, combined with a positive self-test, strengthen the case for seeking formal evaluation.
Warning signs
Five common warning signs of a rotator cuff tear include: sudden onset of shoulder weakness, pain when reaching overhead or behind the back, difficulty lifting everyday objects, weakness in external rotation, and night pain that wakes you from sleep. If you recognize three or more of these signs alongside a positive self-test, professional imaging such as an ultrasound or MRI becomes the logical next step, per Dr. McClintock’s orthopedic guidance.
Pain locations
Rotator cuff pain typically concentrates at the shoulder joint itself, with the front and side of the shoulder being most common. Referred pain may extend down the upper arm toward the elbow. Pain that originates from the supraspinatus tendon frequently worsens when raising the arm to shoulder height or during movements requiring the arm to be in the “empty can” position. Pain radiating beyond the elbow or into the neck warrants consideration of alternative sources.
If the Drop Arm Test produces a sudden, dramatic drop with intense pain, do not continue testing. That result is a strong indicator of a serious injury demanding immediate medical evaluation. Attempting to push through can worsen the condition.
Can a slightly torn rotator cuff heal itself?
The body’s capacity to heal minor rotator cuff injuries exists, but it depends on factors including tear size, location, patient age, and activity demands. Partial-thickness tears and small full-thickness tears sometimes improve with conservative management, though complete healing of the tendon tissue is not guaranteed.
Healing process
Tendons heal slowly by nature. Blood supply to rotator cuff tendons is limited, which means recovery timelines often stretch to months rather than weeks. Early stages of healing benefit from relative rest, followed by supervised physical therapy to restore range of motion without overloading the tissue. Clinical observations suggest that some small tears remain stable over years without progressing, while others slowly enlarge—a variability that makes individual monitoring essential.
Non-surgical options
Four non-surgical treatment paths commonly support rotator cuff healing: rest and activity modification, targeted physical therapy exercises, corticosteroid injections for pain management, and platelet-rich plasma (PRP) or other biologic injections aimed at promoting tissue healing. The choice depends on symptom severity, tear characteristics visible on imaging, and the patient’s functional goals. Cawley Physical Therapy’s clinical approach emphasizes that early, guided exercise programs often outperform prolonged immobilization for smaller tears.
Choosing conservative treatment over surgery means accepting a longer timeline with uncertain tissue healing—but it also means avoiding surgical risks and recovery burdens. The decision ultimately hinges on how your symptoms align with imaging findings and what function matters most to you.
What is the fastest way to heal a torn rotator cuff?
No magic shortcut exists for rotator cuff healing, but an evidence-informed approach can optimize recovery speed and quality. Consistency with a structured rehab program, appropriate loading of the tendon, and addressing sleep and lifestyle factors that influence inflammation all contribute to faster functional recovery.
Non-surgical treatments
Four non-surgical treatments worth exploring: physical therapy focusing on scapular stabilization and progressive tendon loading, anti-inflammatory medication to manage flare-ups during rehab, corticosteroid injections for short-term symptom control when inflammation spikes, and structured home exercise programs tailored to your specific test results. Imaging findings should guide which combination your clinician recommends, as treatment emphasis shifts based on tear severity and location.
Exercises and natural methods
Movement-based recovery, when introduced at the right stage, accelerates healing more effectively than rest alone. Pendulum exercises gently engage the rotator cuff without compressive load. Isometric holds in tolerable positions maintain muscle activation during early recovery phases. As pain permits, resistance bands introduce progressive loading to the supraspinatus and surrounding cuff muscles. Sleep positioning matters too: avoiding lying directly on the affected shoulder and using pillows for support can meaningfully reduce night pain that otherwise interferes with healing quality.
Exercises that speed recovery in one person can delay healing in another if introduced too aggressively or at the wrong stage. Respecting pain as a signal—not just a symptom to suppress—distinguishes effective rehab from counterproductive overloading.
If it hurts or causes pain, that’s a positive Empty Can Test. Pain is the signal that something in the supraspinatus tendon or its surrounding structures is being stressed beyond its current tolerance.
— Centeno-Schultz Clinic (interventional pain management specialists)
A positive result is a dramatic indicator of a serious injury that requires immediate professional attention. The Drop Arm Test does not lie when a full-thickness tear is present.
— Cawley Physical Therapy (outpatient orthopedic and sports therapy)
The self-tests covered here—Empty Can, Drop Arm, and Lift-Off—give you actionable signals about your rotator cuff health without leaving home. They are not replacements for clinical judgment or imaging, but they are practical tools for deciding whether a professional visit is warranted and for articulating your symptoms more precisely when you get there. A positive Drop Arm warrants same-week medical attention; a positive Empty Can with manageable pain may wait for a scheduled appointment, but still deserves discussion with your clinician. For anyone experiencing persistent shoulder weakness or pain that limits daily activities, the next step is clear: use these tests as a starting point, then let imaging and professional assessment fill in the rest.
Related reading: Why Is My Tongue White? Causes, Treatments & Prevention · Shoppers Drug Mart Grande Prairie – Locations Hours Services Guide
Patients with shoulder discomfort can start with the empty can test, while exploring this at-home rotator cuff guide provides additional diagnostic steps and precautions.
Frequently asked questions
What causes rotator cuff injuries?
Rotator cuff injuries typically result from repetitive overhead motion, traumatic fall or pull on the arm, age-related tendon degeneration, poor shoulder mechanics, or a combination of these factors. Athletes, construction workers, and anyone performing repeated lifting or reaching movements faces elevated risk.
When should I see a doctor for shoulder pain?
See a doctor if you experience sudden weakness preventing arm use, pain that disrupts sleep for more than a few nights, a positive Drop Arm Test result, or symptoms that do not improve with rest after two weeks. Early imaging can prevent small tears from progressing to larger ones.
What is the drop arm test?
The Drop Arm Test involves raising your arm to 90 degrees of abduction, then attempting to lower it slowly and controlled. An inability to control the descent or sudden dropping of the arm signals a positive result, indicating likely full-thickness supraspinatus involvement.
How accurate are at-home rotator cuff tests?
Studies cite the Drop Arm Test’s sensitivity around 73% and specificity around 77% in clinical settings. At-home accuracy depends on proper positioning, honest interpretation, and whether a partner assists with the Drop Arm. These tests are screening tools, not diagnostic instruments.
What imaging confirms a tear?
Ultrasound and MRI are the primary imaging modalities for confirming rotator cuff tears. Ultrasound offers real-time dynamic assessment at lower cost; MRI provides superior detail of tear size, tendon retraction, and muscle fatty infiltration. Your clinician determines which is appropriate based on clinical suspicion.
Are exercises safe during recovery?
Guided exercises are safe and beneficial when started at the appropriate stage of healing. Premature loading of a torn tendon can worsen the injury. A physical therapist can design a progressive program aligned with your imaging findings and symptom response.
How long does rotator cuff recovery take?
Recovery timelines vary widely. Minor strains may improve within 4-6 weeks of conservative care. Partial-thickness tears often require 3-6 months of rehabilitation. Full-thickness tears treated without surgery may stabilize over 6-12 months but rarely achieve complete tissue healing.
More related posts
 Raegan Revord: Age, Height, Net Worth, Relationships, and Career
 Rideau Valley Health Centre: Hours, Services & Booking
 Pauly Shore: Health, Surgery, Ethnicity, Net Worth & More
 Kal Tire Near Me: Hours, Locations & Phone Numbers
 What to Watch on Prime: Top Series & Movies Right Now
 BoC Rate Announcement Dates 2025: Full Official Schedule
 Normal Temperature for Adult: Ranges, Fever Thresholds & Concerns
 Silver Spot Price Canada: Live CAD Rate & Foreca t